Salesforce
Before starting your application instrumentation, ensure that you have created an app and have an appKey
Install and Intialize
Download the PyzeSalesforceComponent
Install the PyzeSalesforceComponent from the Salesforce AppExchange.
Obtain Pyze App Key
Once the component is installed get the PyzeAppKey for your application by visiting growth.pyze.com.
Adding Pyze App Key in the application.
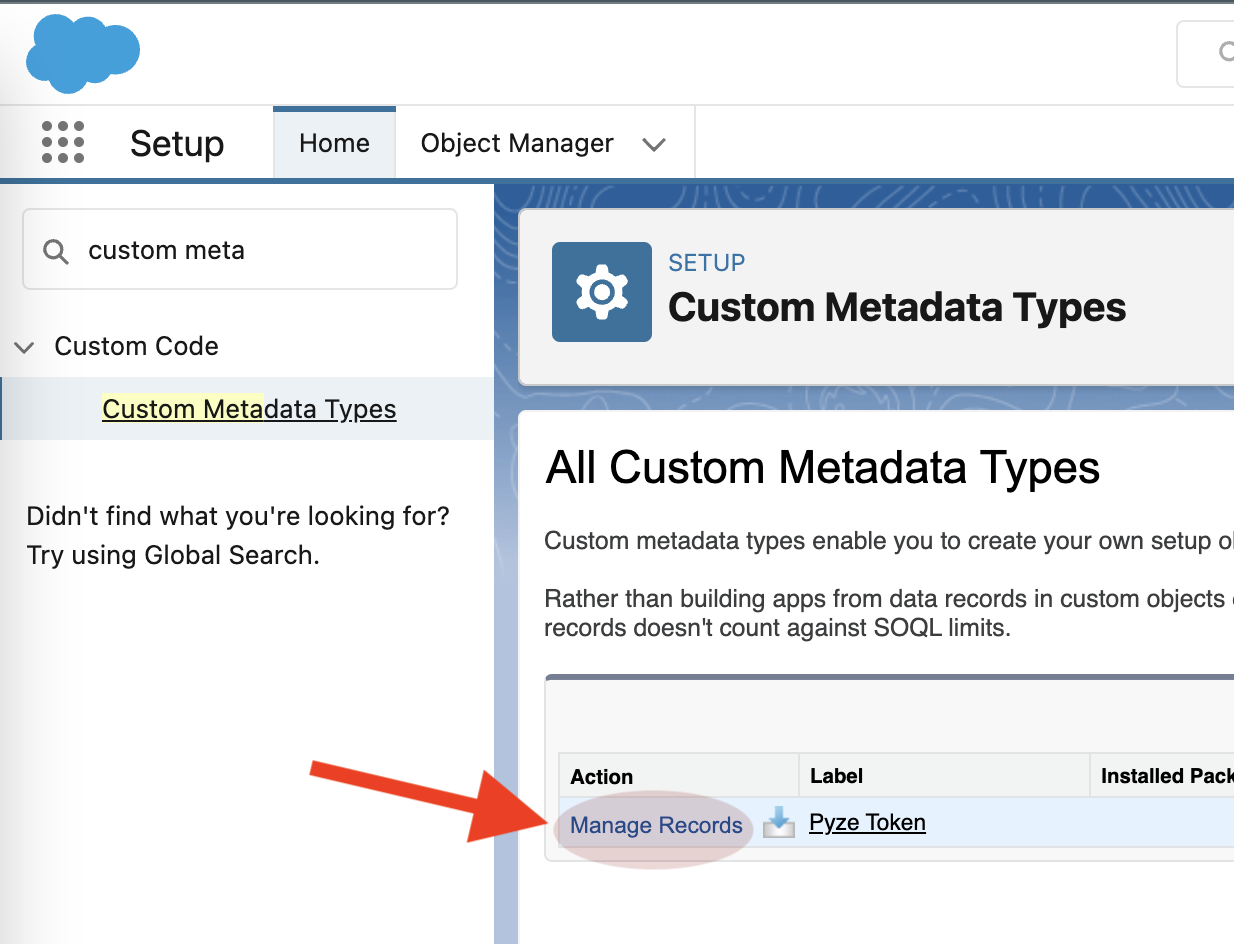
Pyze Client side agent reads the Pyze App Key from specific custom metadata variable in Salesforce.
To add or update PyzeAppKey, search for Custom Metadata Types under Custom Code and click on Manage Record as shown below.
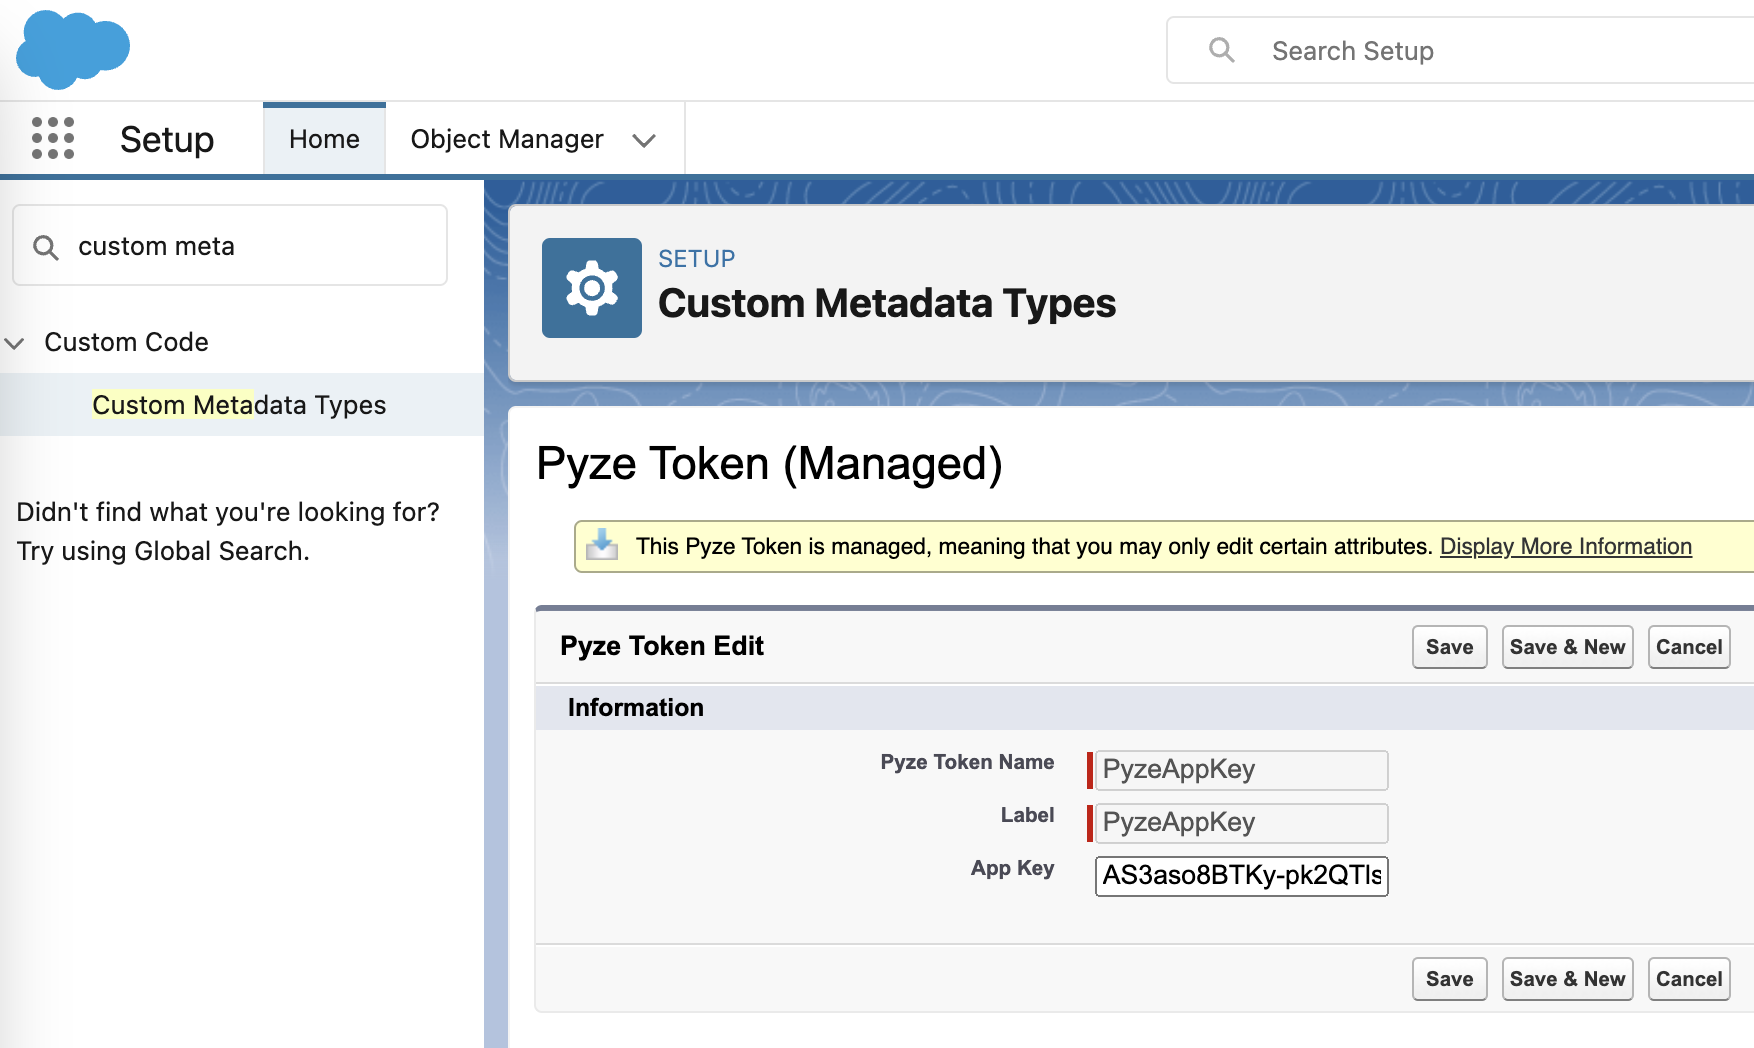
Finally, update the App Key value to the key obtained from growth.pyze.com and save the changes, as shown below.
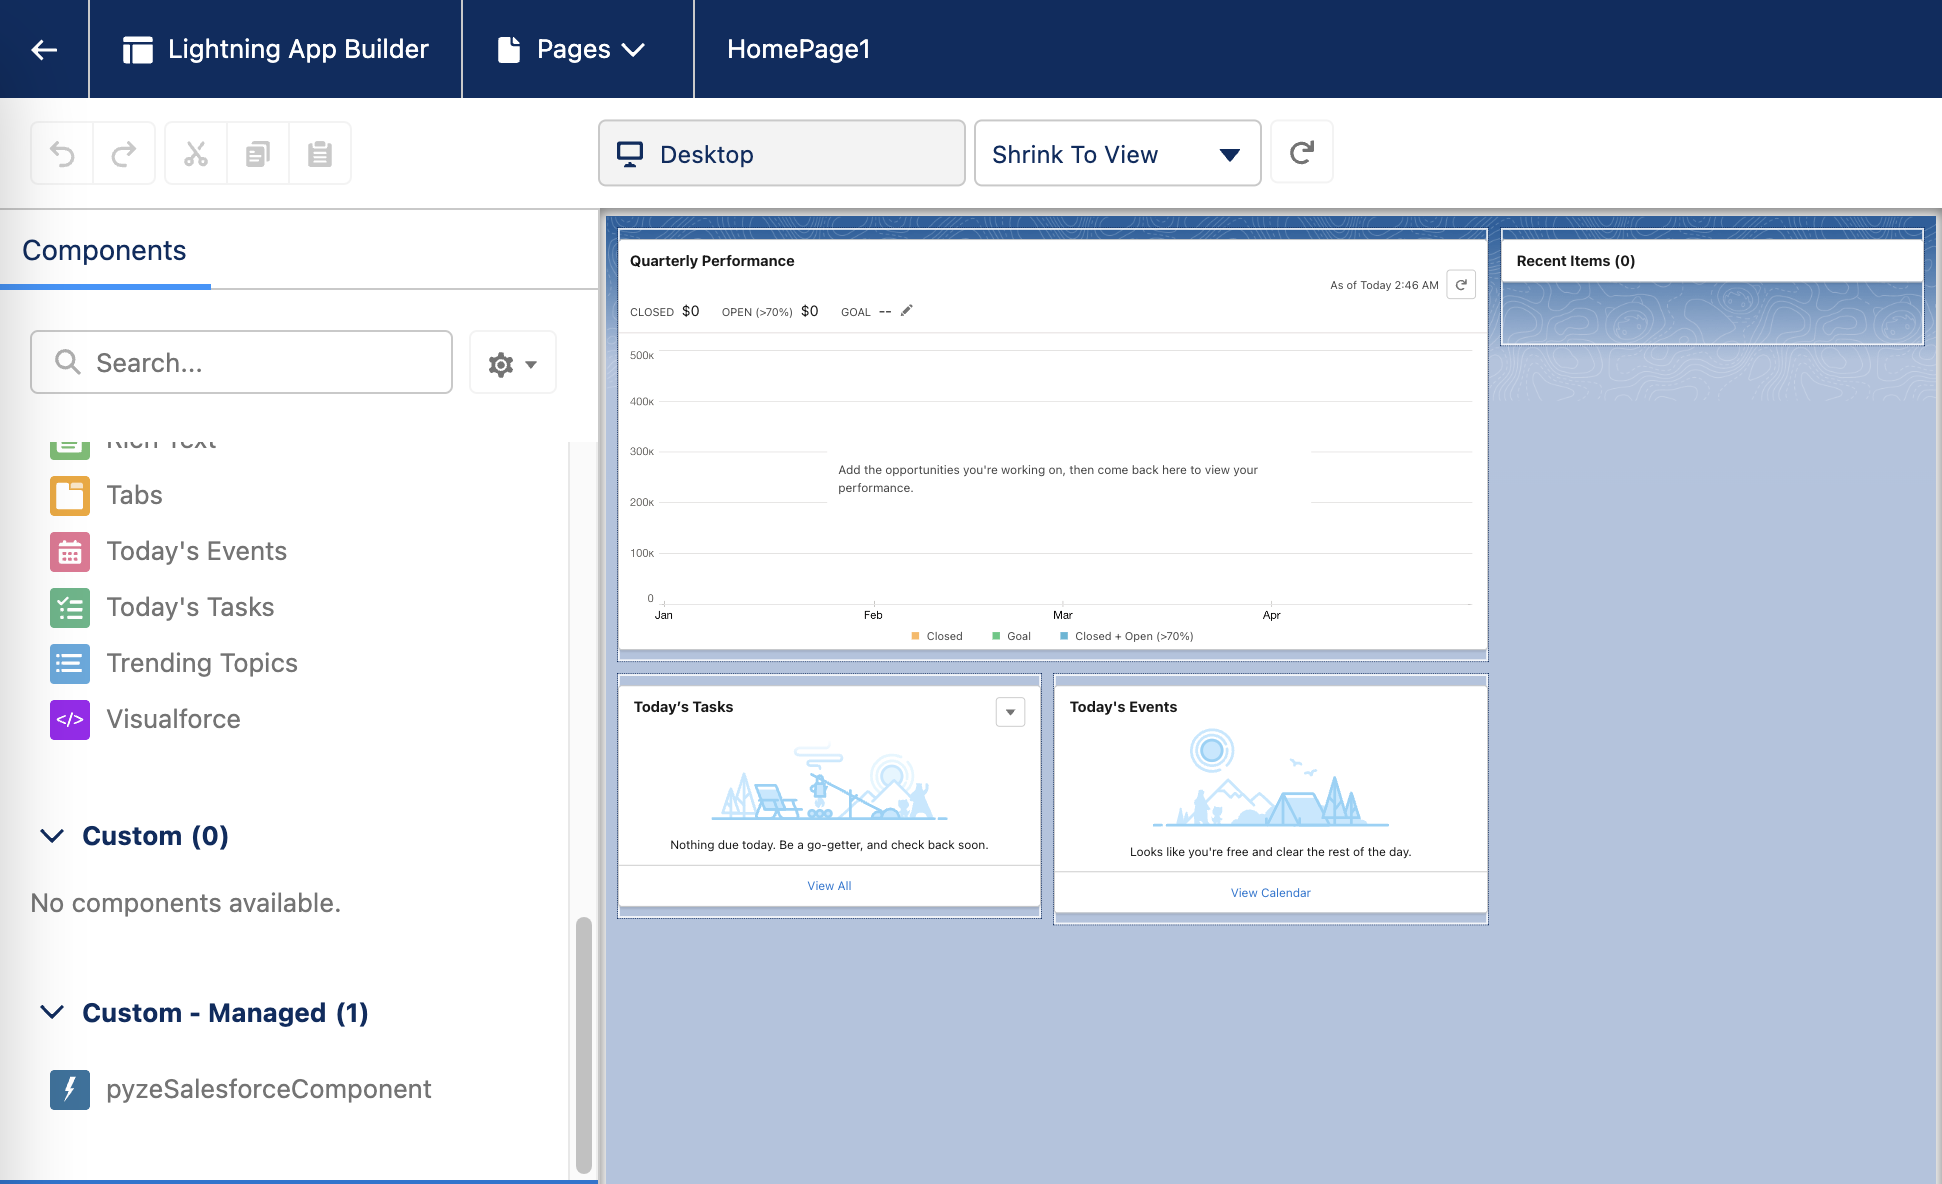
Drag and drop the PyzeSalesforceComponent on any page in Salesforce application.
Pyze package contains predefined lightning component called pyzeSalesforceComponent, add this component to your application get started quickly with Pyze.
Add the component to the application page, by selecting Edit Page option of the application setting menu.
 Once you are on the edit page, from the
 Components side bar drag and drop the PyzeSalesforceComponent on the page.
Manual Initialization
You can also choose to manually create a component which you can drop into the application. Follow the instruction below to create Lightning compoenent. This section also has instructions to add Pyze SDK to aura application and visual force pages.
Lightning Component integration
Add the pyze snippet shown below to any existing lightning component on the page or create a blank new custom lightning web component to initialize Pyze on the lightning web application.
/* import the PyzeSalesforce library into the lightning component*/
import { LightningElement, track } from 'lwc';
import { loadScript } from 'lightning/platformResourceLoader';
import pyzeSalesForce from '@salesforce/resourceUrl/PyzeSalesforce';

export default class HelloWorld extends LightningElement {
   /* Load the script and initialize */
    connectedCallback(){
        Promise.all([
            loadScript(this, pyze_tracking), // Pyze SDK script
        ])
        .then(() => {
            Pyze.initialize("YOUR_PYZE_APP_KEY"); // Initialize Pyze once library is loaded successfully!
        })
        .catch(error => {
            console.log("Error!");
        });
    }
}
Note : The above initialization code should be added to exactly one component on the page.
Check the link for more information about how to load js library inside a lighting web component.
Lightning Aura Component or Application integration
Similarly, the following code can be used to initialise Pyze in an application that was built using Aura components.
/* - import the PyzeSalesforce library into the lightning aura component or application
   - Define a function to run after script loaded successfully! */
<ltng:require scripts="{!$Resource.PyzeSalesForce}" afterScriptsLoaded="{!c.initializePyze}" />

/* Initialize Pyze Salesforce SDK  once the library loaded successfully! */
initializePyze : function(component, event, helper) {
    Pyze.initialize("YOUR_PYZE_APP_KEY");
}
Note : The above initialization code should be added to exactly one component on the page.
Check the link for more information about how to load js library inside a lighting aura component or application.
Visualforce component integration
It is possible to initialize Pyze on a visual Salesforce page by using IncludeScript to load the script and script tags to invoke Pyze. set up as depicted below
/* - import the PyzeSalesforce library into the visualforce page */
<apex:includeScript value="{!$Resource.pyzeTrackingSnippet}"/>

/* Initialize Pyze Salesforce SDK  once the library loaded successfully! */
<script>
   Pyze.initialize("YOUR_PYZE_APP_KEY");
</script>
Check the link for more information about how to import js library into a visual Salesforce page
Warning
Make sure you replacedYOUR_PYZE_APP_KEY with your own appKey
Custom Events
Events allow you to easily track unique user actions within your app.
After adding Pyze to any one of component of the page, you can send custom events via the Pyze.postCustomEvent API as shown below. You can call this from anywhere on the page.
Event
// Custom Event without Attributes
PyzeEvents.postCustomEvent("Blog Read");

This allows you to track when a user executed an action, for a simple count of how often that event is occurring.
Event with Attributes
Attributes are any key-value pair that you can attach to an event. You can have up to 99 attributes with any event. It is highly recommended to follow our Best Practices and heavily rely on attributes to make your instrumentation as minimal and useful as possible. In a typical application, you should have many more attributes than events.
// Custom Event with Attributes
// Create an object with key value pairs of custom attributes and post with postCustomEventWithAttributes

var attributes = {};
attributes["screen"] = "Home";
attributes["seconds spent"] = "50";

PyzeEvents.postCustomEventWithAttributes("Blog Read", attributes);

//Events with Attributes as Object
var attributes = {};
var address = {"city":"Redwood city","state":"CA","phone":{"home":{"area":"408", "prefix":"434", "linenumber":"5234"}}};
attributes["address"] = address;
PyzeEvents.postCustomEventWithAttributes('Blog Read', attributes)
Timed Events
Timing how long a user takes to complete an action is a common usecase for Pyze. The SDk has built-in handling for this, by allowing you to start a timer, and then send a custom event at the completion of that action.
startTimerForEvent- Start the timer with a namepostTimedEvent- End the timer by referencing the same name. The time in milliseconds will automatically be attached to this event. You can also optionally pass attributes as an additional paramater as show in the example below
//Start timer for event
PyzeEvents.startTimerForEvent("Screen Load Time");

//Post timed event.
//Note : The event name attribute for the `startTimerForEvent` and  `postTimedEvent` should match.
PyzeEvents.postTimedEvent("Screen Load Time");

//Post timed event API when you want to send additional attributes
var customAttributes = {};
customAttributes["device"] = "iMac";
customAttributes["location"] = "CA";
PyzeEvents.postTimedEventWithAttributes("Screen Load Time", customAttributes);
Dimensions
Dimensions are attributes that get attached to all events within a session. This is useful to have a standard set of attributes that change over time, and is simply a helper to accomplish this goal.
Dimensions are any key-value pairs that you attach to the initialize call. Create an object, and modify the initialize call to include this object.
var dimensions = {
  "department": "marketing",
  "role": "associate",
  "alpha": true
}

Pyze.initialize(pyzeAppKey, dimensions);
Profile
Profiles are a powerful way to add data about your users to Pyze. Use profiles to add data that is not specific to a point in time (events) and are attached to a specific user.
When a user logs in to your app, call setUserProfile to identify them to Pyze. Any events that happen after they are identified, will be attributed to this user. You should only call this method once upon the initial login of a session.
You can optionally include profile attributes.
Pyze built-in profile attributes get special handling in the pyze UI, and we will attempt to discern the data type for custom attributes based on the data recieved. There is no difference between the built-in attributes and custom ones outside of formatting applied.
//Create Pyze Profile Attributes object
var pyzeProfileAttributes = {
   "email_id"        : "xyz@abc.com",
   "date_of_birth"   : "1984-06-01",
   "first_name"      : "John",
   "last_name"       : "Jacobs"
}
//Create Custom Profile Attributes object
var customProfileAttributes = {
   "age"       : 29,
   "pincode"   : "23200",
   "city"      : "XYZ"
}
//Call the setUserProfile API
PyzeIdentity.setUserProfile(userId,pyzeProfileAttributes,customProfileAttributes);
Pyze profile attributes
| Pyze User Profile Field Name | Data Type/Description |
|---|---|
| background | (string) User background, biography or historical data |
| country | (string) Country codes must be sent in the ISO-3166-1 alpha-2 standard. |
| current_location | (object) Format: {“longitude”: -33.991894, “latitude”: 25.243732} |
| date_of_first_use | (date at which the user first used the app) String in ISO 8601 format or in yyyy-MM-dd’T’HH:mm:ss.SSSZ format. |
| date_of_last_use | (date at which the user last used the app) String in ISO 8601 format or in yyyy-MM-dd’T’HH:mm:ss.SSSZ format. |
| date_of_birth | (date of birth) String in format “YYYY-MM-DD”, example: 1984-06-01. |
| email_id | (string) Email Id |
| email_subscribe | (string) Acceptable values are “opt_in” (explicit approval to receive email messages), “opt_out” (explicit denial to email messages), and “subscribed” (neither opted in nor out). |
| email_hard_bounced | Automatically updated when a hard bounce occurs (true or false) |
| email_spam_reported | Automatically updated when a user marks your email as spam, via the ISP (true or false) |
| facebook_id | facebook ID |
| first_name | (string) User’s First name |
| gender | (string) “M”, “F”, “O” (other), “N” (not applicable), “P” (prefer not to say) or “U” (unknown). |
| home_city | (string) User’s Home City |
| image_url | (string) URL of image to be associated with the user |
| language | (string) Require language to be sent in the ISO-639-1 standard. |
| last_name | (string) User’s Last Name |
| marked_email_as_spam_at | (string) Date at which the user’s email was marked as spam. Must be in ISO 8601 format or in yyyy-MM-dd’T’HH:mm:ss.SSSZ format. |
| phone | (string) Phone number |
| push_subscribe | (string) Available values are “opted_in” (explicitly registered to receive push messages), “unsubscribed” (explicitly opted out of push messages), and “subscribed” (neither opted in nor out). |
| push_tokens | Array of objects with app_id and token string. You may optionally provide a device_id for the device this token is associated with, e.g., [{“app_id”: App Identifier, “token”: “abcd”, “device_id”: “optional_field_value”}]. If a device_id is not provided, one will be randomly generated. |
| time_zone | (string) Time Zone’s must be sent as per IANA Time Zone Database (e.g., “America/New_York” or “Eastern Time (US & Canada)”). Only valid values will be respected. |
| twitter_id | Twitter ID |
Updating an existing user Profile
To update user profile attributes which are already set, use the following api.
Note : Do not call this api before calling setUserProfile.
//Create Pyze Profile Attributes object
var pyzeProfileAttributes = {
   "email_id"        : "xyz2@abc.com",
   "date_of_birth"   : "1984-07-01",
   "first_name"      : "John M",
   "last_name"       : "Jacobs"
}
//Create Custom Profile Attributes object
var customProfileAttributes = {
   "age"       : 29,
   "pincode"   : "232001",
   "city"      : "XYZ2"
}
//Call the updateUserProfileAttributes API
PyzeIdentity.updateUserProfile(pyzeProfileAttributes,customProfileAttributes);
Logging out a user
Call this api when a user logs out. Event sent after this call will have no identity attached, and will be attributed to an anonymous user.
PyzeIdentity.resetUserProfile();
User Privacy
Pyze provides APIs to allow end-users to Opt out of Data Collection and also instruct the Pyze system to forget a user’s data.
setUserOptOut
Allows end-users to opt out from data collection. Opt-out can be toggled true or false.
Pyze.setUserOptOut(true)
To resume user data collection set value to false
deleteUser
Allows end-users to opt out from data collection and delete the user in the Pyze system. We recommend you confirm this action as once a user is deleted, this cannot be undone.
Pyze.deleteUser(true)
API Reference
Full API reference available here