Web
アプリケーションのインストルメンテーションを開始する前に、アプリを作成してappKeyがあることを確認してください。
インストール
Javascript SDKのインストールは、javascriptの機能を提供するすべてのページにスニペットを含めることで行われ、最新バージョンのpyze.jsを当社のCDNから引っ張ってきます。
初期化
- Pyze Growth Intelligenceを使用している全てのページの
<head>タグと</head>タグの間に以下のJavaScriptコードを貼り付けてください。 PYZE_APP_KEYをgrowth.pyze.comアカウントから取得したPyze App Keyに置き換えてください。- JavaScriptライブラリは、2つのグローバル変数を提供しています。
PyzeとPyzeEventsで、Pyzeサーバーにデータを送信します。
// Start Pyze Script
<script type="text/javascript">
    var pyzeAppKey="YOUR_PYZE_APP_KEY";
    !function(e,t){var s=e.Pyze||{_q:[]},i=e.PyzeEvents||{_q:[]},n=e.PyzeCuratedEvents||{_q:[]},r=e.PyzeIdentity||{_q:[]};function p(t,e){function s(e){t[e]=function(){t._q.push([e].concat(Array.prototype.slice.call(arguments,0)))}}for(var i=0;i<e.length;i++)s(e[i])}p(s,["initialize","getTimerReference","getAppInstanceId","postWebAppVersion","postPageView","setUserOptOut","deleteUser"]),p(i,["postCustomEvent","startTimerForEvent","postCustomEventWithAttributes","postTimedEvent","postTimedEventWithAttributes","postExplicitActivation"]),p(n,["post"]),p(r,["setUserProfile","resetUserProfile","updateUserProfile"]);var o=t.createElement("script"),a=t.getElementsByTagName("script")[0];o.type="text/javascript",o.async=!0,o.src="https://cdn.pyze.com/pyze.js",a.parentNode.insertBefore(o,a),e.Pyze=s,e.PyzeEvents=i,e.PyzeCuratedEvents=n,e.PyzeIdentity=r}(window,document),Pyze.initialize(pyzeAppKey);
</script>
// End Pyze Script
警告
PYZE_APP_KEY を独自の appKey に置き換えたことを確認してください。
カスタムイベント
イベントでは、アプリ内でのユーザーのユニークなアクションを簡単に追跡することができます。
イベント
PyzeEvents.postCustomEvent("Blog Read");
これにより、ユーザーがいつアクションを実行したかを追跡し、そのイベントがどれくらいの頻度で発生しているかを簡単にカウントすることができます。
属性を持つイベント
属性とは、イベントにアタッチできるキーと値のペアのことです。どのイベントでも最大99個の属性を持つことができます。ベスト・プラクティスを遵守し、アトリビュートに大きく依存して、インストルメンテーションを可能な限り最小限にして有用にすることを強くお勧めします。典型的なアプリケーションでは、イベントよりも多くの属性を持つべきです。
// Create an object with key value pairs of custom attributes and post with postCustomEventWithAttributes

var attributes = {};
attributes["screen"] = "Home";
attributes["seconds spent"] = "50";

PyzeEvents.postCustomEventWithAttributes("Blog Read", attributes);

//Events with Attributes as Object
var attributes = {};
var address = {"city":"Redwood city","state":"CA","phone":{"home":{"area":"408", "prefix":"434", "linenumber":"5234"}}};
attributes["address"] = address;
PyzeEvents.postCustomEventWithAttributes('Blog Read', attributes)
タイムドイベント
ユーザーがアクションを完了するまでの時間を計ることは、Pyze の一般的な使用例です。SDkには、タイマーを開始し、アクションの完了時にカスタムイベントを送信できるようにすることで、これを処理する機能が組み込まれています。
startTimerForEvent- 名前を指定してタイマーを開始するpostTimedEvent- 同じ名前を参照してタイマーを終了します。ミリ秒単位の時間が自動的にこのイベントに添付されます。また、以下の例のように、追加のパラメタとして属性を渡すこともできます。
//Start timer for event
PyzeEvents.startTimerForEvent("Screen Load Time");

//Post timed event.
//Note : The event name attribute for the `startTimerForEvent` and  `postTimedEvent` should match.
PyzeEvents.postTimedEvent("Screen Load Time");

//Post timed event API when you want to send additional attributes
var customAttributes = {};
customAttributes["device"] = "iMac";
customAttributes["location"] = "CA";
PyzeEvents.postTimedEventWithAttributes("Screen Load Time", customAttributes);
寸法
ディメンジョンは、セッション内のすべてのイベントにアタッチできる属性です。これは、時間の経過とともに変化する属性の標準セットを持っていると便利であり、この目標を達成するための単なるヘルパーです。
ディメンジョンは、初期化コールにアタッチするキーと値のペアです。オブジェクトを作成し、このオブジェクトを含むように initialize 呼び出しを修正します。
var dimensions = {
  "department": "marketing",
  "role": "associate",
  "alpha": true
}

Pyze.initialize(pyzeAppKey, dimensions);
プロフィール
プロファイルは、Pyzeにユーザーに関するデータを追加するための強力な方法です。プロファイルを使用して、ある時点(イベント)に固有のデータではなく、特定のユーザーに関連付けられたデータを追加することができます。
ユーザーがアプリにログインしたら、setUserProfileを呼び出してPyzeにユーザーを識別します。ユーザーが識別された後に発生したイベントはすべて、このユーザーに帰属します。このメソッドは、セッションの最初のログイン時に一度だけ呼び出す必要があります。
オプションでプロファイル属性を含めることができます。
Pyzeの組み込みプロファイル属性はpyze UIで特別な扱いを受けますが、受信したデータに基づいてカスタム属性のデータ型を判別しようとします。ビルトイン属性とカスタム属性の間には、適用されるフォーマット以外の違いはありません。
//Create Pyze Profile Attributes object
var pyzeProfileAttributes = {
   "email_id"        : "xyz@abc.com",
   "date_of_birth"   : "1984-06-01",
   "first_name"      : "John",
   "last_name"       : "Jacobs"
}
//Create Custom Profile Attributes object
var customProfileAttributes = {
   "age"       : 29,
   "pincode"   : "23200",
   "city"      : "XYZ"
}
//Call the setUserProfile API
PyzeIdentity.setUserProfile(userId,pyzeProfileAttributes,customProfileAttributes);
Pyzeのプロフィール属性
| Pyze ユーザープロファイル フィールド名 | データの種類/説明 |
|---|---|
| background | (文字列) ユーザーの背景、経歴または履歴データ |
| country | (文字列) 国コードは ISO-3166-1 alpha-2 規格で 送信する必要があります。 |
| current_location | (オブジェクト) フォーマッ ト。{“longitude”. -33.991894, “緯度”. 25.243732} |
| date_of_first_use | (ユーザーが最初にアプリを使用した日付) ISO 8601形式またはyyyy-MM-dd’T’HH:mm:ss.SSZ形式の文 字列。 |
| date_of_last_use | (ユーザーが最後にアプリを使用した日付) ISO 8601形式の文字列、またはyyyy-MM-dd’T’T’HH:mm:ss.SSZ形 式の文字列。 |
| date_of_birth | (生年月日) “YYYY-MM-DD"形式の文字列。 |
| email_id | (文字列) 電子メール ID |
| email_subscribe | 文字列) 使用可能な値 は、“opt_in”(メールメッセージの受信を明示的に承認)、“opt_out”(メールメッセージの受信を明示的に拒否)、“subscribed”(オプトインもオプトアウトもしていない)です。 |
| email_hard_bounced | ハードバウンスが発生した場合に自動的に更新されます (true またはfalse) |
| email_spam_reported | ユーザーがISP経由でメールをスパムとしてマークした場合、自動的に更新されます(trueまたはfalse) |
| facebook_id | (文字列) facebook ID |
| first_name | (文字列) ユーザのファーストネーム |
| gender | 文字列)「M」、「F」、「O」(その他)、「N」(該当しない)、「P」(言いたくない)、「U」(不明 |
| home_city | (文字列) ユーザーの出身地 |
| image_url | (文字列) ユーザーに関連付けられる画像の URL |
| language | (文字列) ISO-639-1 標準で送信する言語を要求します。 |
| last_name | (文字列) ユーザの姓 |
| marked_email_as_spam_at | (文字列) ユーザーの電子メールがスパムとしてマークされた日付。ISO 8601形式、またはyyyy-MM-dd’T’HH:mm:ss.SSSZ形式でなければなりません。 |
| phone | (文字列) 電話番号 |
| push_subscribe | (文字列) 利用可能な値 は、“opted_in”(明示的にプッシュ メッセージを受信するように登録され ている)、“unsubscribed”(明示的にプッシュメッセージをオプトアウトしている)、“subscribed”(オプトインもオプトアウトもしていない)です。 |
| push_tokens | app_id とトークン文字列を持つオブ ジェクトの配列。オプションで、この トークンが関連付けられているデバ イスの device_id を指定することがで きます。アプリ識別子、“token”. “abcd”, “device_id”. “optional_field_value”}]。device_id が 指定されていない場合は、ランダム に生成されます。 |
| time_zone | (文字列) タイムゾーンはIANAタイム ゾーンデータベース(例: “America/New_York “や “Eastern Time (US & Canada)")に従って送信 されなければなりません。有効な値 のみが尊重されます。 |
| twitter_id | (文字列)Twitter ID |
既存のユーザープロファイルの更新
既に設定されているユーザプロファイルの属性を更新するには、以下のAPIを使用します。
注意 : setUserProfileを呼び出す前にこのAPIを呼び出さないでください。
//Create Pyze Profile Attributes object
var pyzeProfileAttributes = {
   "email_id"        : "xyz2@abc.com",
   "date_of_birth"   : "1984-07-01",
   "first_name"      : "John M",
   "last_name"       : "Jacobs"
}
//Create Custom Profile Attributes object
var customProfileAttributes = {
   "age"       : 29,
   "pincode"   : "232001",
   "city"      : "XYZ2"
}
//Call the updateUserProfileAttributes API
PyzeIdentity.updateUserProfile(pyzeProfileAttributes,customProfileAttributes);
ユーザーのログアウト
ユーザがログアウトした際にこの API を呼び出します。このコールの後に送信されるイベントには ID は付与されず、匿名のユーザに帰属します。
PyzeIdentity.resetUserProfile();
ユーザーのプライバシー
Pyzeは、エンドユーザーがデータ収集からオプトアウトしたり、ユーザーのデータを忘れるようにPyzeシステムに指示したりするためのAPIを提供しています。
setUserOptOut
エンドユーザーがデータ収集からオプトアウトできるようにします。オプトアウトはTrueかFalseかを切り替えることができます。
Pyze.setUserOptOut(true)
ユーザーデータの収集を再開するには、値を false に設定します。
削除ユーザー
エンドユーザがデータ収集からオプトアウトし、Pyzeシステム内のユーザを削除することができます。一度削除したユーザーは元に戻すことができませんので、確認することをお勧めします。
Pyze.deleteUser(true)
プラットフォームとCMSの統合
AngularJS
次の JavaScript コードをアプリのメイン HTML ファイルに貼り付けます。
// Start Pyze Script
<script type="text/javascript">
    var pyzeAppKey="YOUR_PYZE_APP_KEY";
    !function(e,t){var s=e.Pyze||{_q:[]},i=e.PyzeEvents||{_q:[]},n=e.PyzeCuratedEvents||{_q:[]},r=e.PyzeIdentity||{_q:[]};function p(t,e){function s(e){t[e]=function(){t._q.push([e].concat(Array.prototype.slice.call(arguments,0)))}}for(var i=0;i<e.length;i++)s(e[i])}p(s,["initialize","getTimerReference","getAppInstanceId","postWebAppVersion","postPageView","setUserOptOut","deleteUser"]),p(i,["postCustomEvent","startTimerForEvent","postCustomEventWithAttributes","postTimedEvent","postTimedEventWithAttributes","postExplicitActivation"]),p(n,["post"]),p(r,["setUserProfile","resetUserProfile","updateUserProfile"]);var o=t.createElement("script"),a=t.getElementsByTagName("script")[0];o.type="text/javascript",o.async=!0,o.src="https://cdn.pyze.com/pyze.js",a.parentNode.insertBefore(o,a),e.Pyze=s,e.PyzeEvents=i,e.PyzeCuratedEvents=n,e.PyzeIdentity=r}(window,document),Pyze.initialize(pyzeAppKey);
</script>
// End Pyze Script
警告
PYZE_APP_KEY を独自の appKey に置き換えたことを確認してください。
シングルページアプリケーションの場合、Pyzeはアプリがルート/ビュー/ロケーションを変更したときにページタイトルとパス名を手動で送信するためにPyze.postPageViewを呼び出す必要があります。 AngularJSの場合は$stateChangeSuccessイベントにバインドする必要がありますが、これは以下のようにrun()関数で行うことができます。
yourAngularApp.run(
    function($rootScope){
        $rootScope.$on('$stateChangeSuccess',function(event, toState, toParams, fromState, fromParams){
            Pyze.postPageView("PageTitle", "Page URL");
        });
    }
);
イベントとプロファイルについては、上記のドキュメントを参照してください。
Reactjs
次のJavaScriptコードをアプリのメインHTMLファイルの</ head>タグの前に貼り付けます
// Start Pyze Script
<script type="text/javascript">
    var pyzeAppKey="YOUR_PYZE_APP_KEY";
    !function(e,t){var s=e.Pyze||{_q:[]},i=e.PyzeEvents||{_q:[]},n=e.PyzeCuratedEvents||{_q:[]},r=e.PyzeIdentity||{_q:[]};function p(t,e){function s(e){t[e]=function(){t._q.push([e].concat(Array.prototype.slice.call(arguments,0)))}}for(var i=0;i<e.length;i++)s(e[i])}p(s,["initialize","getTimerReference","getAppInstanceId","postWebAppVersion","postPageView","setUserOptOut","deleteUser"]),p(i,["postCustomEvent","startTimerForEvent","postCustomEventWithAttributes","postTimedEvent","postTimedEventWithAttributes","postExplicitActivation"]),p(n,["post"]),p(r,["setUserProfile","resetUserProfile","updateUserProfile"]);var o=t.createElement("script"),a=t.getElementsByTagName("script")[0];o.type="text/javascript",o.async=!0,o.src="https://cdn.pyze.com/pyze.js",a.parentNode.insertBefore(o,a),e.Pyze=s,e.PyzeEvents=i,e.PyzeCuratedEvents=n,e.PyzeIdentity=r}(window,document),Pyze.initialize(pyzeAppKey);
</script>
// End Pyze Script
警告
PYZE_APP_KEY を独自の appKey に置き換えたことを確認してください。
シングルページアプリケーションでは、アプリがルート/ビュー/ロケーションを変更したときに、Pyze.postPageViewを呼び出してページタイトルとパス名を手動で送信する必要があります。
An example using the Simple React example app is below Simple Reactのサンプルアプリを使用した例は以下の通りです。
import React from 'react';
import ReactDOM from 'react-dom';
import { Router, Route, browserHistory } from 'react-router';
import Home from './app/screens/Home';
import User from './app/screens/User';
import 'bootstrap/dist/css/bootstrap.min.css';
import './assets/styles.css';
ReactDOM.render(
  <Router history={browserHistory}>
    <Route path="/" component={Home} />
    <Route path="/:username" component={User} />
  </Router>,
  document.getElementById('container')
);

browserHistory.listen(function (location) {
    Pyze.postPageView(document.title, location.pathname);
});
イベントとプロファイルについては、上記のドキュメントを参照してください。
Squarespace
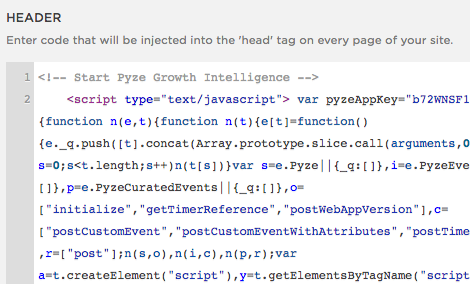
Squarespaceサイトにログインし、Setting -> Advanced tab under Website -> Code Injectionをクリックし、ヘッダーセクションにPyze App Keyを含むPyze Trackingのスニペットを貼り付けます。
// Start Pyze Script
<script type="text/javascript">
    var pyzeAppKey="YOUR_PYZE_APP_KEY";
    !function(e,t){var s=e.Pyze||{_q:[]},i=e.PyzeEvents||{_q:[]},n=e.PyzeCuratedEvents||{_q:[]},r=e.PyzeIdentity||{_q:[]};function p(t,e){function s(e){t[e]=function(){t._q.push([e].concat(Array.prototype.slice.call(arguments,0)))}}for(var i=0;i<e.length;i++)s(e[i])}p(s,["initialize","getTimerReference","getAppInstanceId","postWebAppVersion","postPageView","setUserOptOut","deleteUser"]),p(i,["postCustomEvent","startTimerForEvent","postCustomEventWithAttributes","postTimedEvent","postTimedEventWithAttributes","postExplicitActivation"]),p(n,["post"]),p(r,["setUserProfile","resetUserProfile","updateUserProfile"]);var o=t.createElement("script"),a=t.getElementsByTagName("script")[0];o.type="text/javascript",o.async=!0,o.src="https://cdn.pyze.com/pyze.js",a.parentNode.insertBefore(o,a),e.Pyze=s,e.PyzeEvents=i,e.PyzeCuratedEvents=n,e.PyzeIdentity=r}(window,document),Pyze.initialize(pyzeAppKey);
</script>
// End Pyze Script
警告
PYZE_APP_KEY を独自の appKey に置き換えたことを確認してください。
イベント情報
カスタムイベントを追跡するには、上記のPyze Events APIを呼び出すイベントハンドラを作成します。
イベントに関与する要素の id または class 属性を渡します。トラッキングのためにJavaScriptのCustomまたはCuratedイベント関数を呼び出します。以下はサンプルコードです。
jQuery( document ).ready( function( $ ) {
    $('#BlogPost_Read').click(function() {
        PyzeEvents.postCustomEventWithAttributes("Blog post read", {"Blog Title" : "Understanding web analytics"});
    });
    $('#BlogPost_Commented').hover(function() {
        PyzeEvents.postCustomEventWithAttributes("Blog post commented", {"Commented By" : "User Identifier"});
    });
    $('#BlogPost_Liked').click( function() {
        PyzeEvents.postCustomEvent("Blog post liked");
    });
});
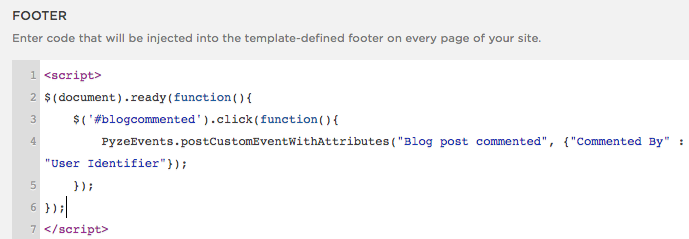
フッター部分にコードを配置し、pyzeへのイベント送信を開始します。
イベントとプロファイルについては、上記のドキュメントを参照してください。
Vue.js
以下のJavaScriptコードをアプリのメインhtmlファイルまたはルートを保持するファイルに貼り付けます。
// Start Pyze Script
<script type="text/javascript">
    var pyzeAppKey="YOUR_PYZE_APP_KEY";
    !function(e,t){var s=e.Pyze||{_q:[]},i=e.PyzeEvents||{_q:[]},n=e.PyzeCuratedEvents||{_q:[]},r=e.PyzeIdentity||{_q:[]};function p(t,e){function s(e){t[e]=function(){t._q.push([e].concat(Array.prototype.slice.call(arguments,0)))}}for(var i=0;i<e.length;i++)s(e[i])}p(s,["initialize","getTimerReference","getAppInstanceId","postWebAppVersion","postPageView","setUserOptOut","deleteUser"]),p(i,["postCustomEvent","startTimerForEvent","postCustomEventWithAttributes","postTimedEvent","postTimedEventWithAttributes","postExplicitActivation"]),p(n,["post"]),p(r,["setUserProfile","resetUserProfile","updateUserProfile"]);var o=t.createElement("script"),a=t.getElementsByTagName("script")[0];o.type="text/javascript",o.async=!0,o.src="https://cdn.pyze.com/pyze.js",a.parentNode.insertBefore(o,a),e.Pyze=s,e.PyzeEvents=i,e.PyzeCuratedEvents=n,e.PyzeIdentity=r}(window,document),Pyze.initialize(pyzeAppKey);
</script>
// End Pyze Script
警告
PYZE_APP_KEY を独自の appKey に置き換えたことを確認してください。
シングルページアプリケーションの場合、Pyzeはアプリがルート/ビュー/ロケーションを変更したときにページタイトルとパス名を手動で送信するためにPyze.postPageViewを呼び出す必要があります。以下の例のように、タイトルとパスにそれぞれto.nameとto.pathを指定してPyze.postPageViewメソッドを呼び出します。
 import Vue from 'vue'
 import Router from 'vue-router'
 import Hello from '@/components/Hello'
 import Page1 from '@/components/Page1'

 Vue.use(Router)

 const router = new Router({
     routes: [
         {
             path: '/',
             name: 'Hello',
             component: Hello
         },
         {
             path: '/Page1',
             name: 'Page1',
             component: Page1
         }

     ]
 })
 export default router

 router.afterEach((to, from) => {
     Pyze.postPageView(to.name, to.path);
 })
イベント情報
カスタムイベントを追跡するには、上記で説明した Pyze Events API を .Vue または .html ファイルから以下のように呼び出します。
<template>
 <div class="hello">
      <h1>{{ msg }}</h1>
      <button @click="testCustomEvent()">Test postCustomEvent</button>
      <button @click="testCustomEventWithAttributes()">Test postCustomEventWithAttributes</button>
      <a href="#/Page1"> <button >Page1</button></a>
</div> </template>
<script>
      export default {
          name: 'hello',
          methods:{
              testCustomEvent : function(){
                  PyzeEvents.postCustomEvent("Send events to Pyze");
              },
              testCustomEventWithAttributes : function(){
                  PyzeEvents.postCustomEventWithAttributes('Sending events with attributes',{'Button Name' : 'Click to send'});
              }
         },
         data () {
             return {
                 msg: 'Welcome to Your Vue.js App'
             }
         }
     }
</script>
Vue.jsとPyzeを統合するためのサンプルアプリが提供されています。
イベントとプロファイルについては、親ドキュメントを参照してください。
Wix
- Wixサイトにログインし、エディタモードに切り替えます。
- 追加プラスのアイコンをクリックします。
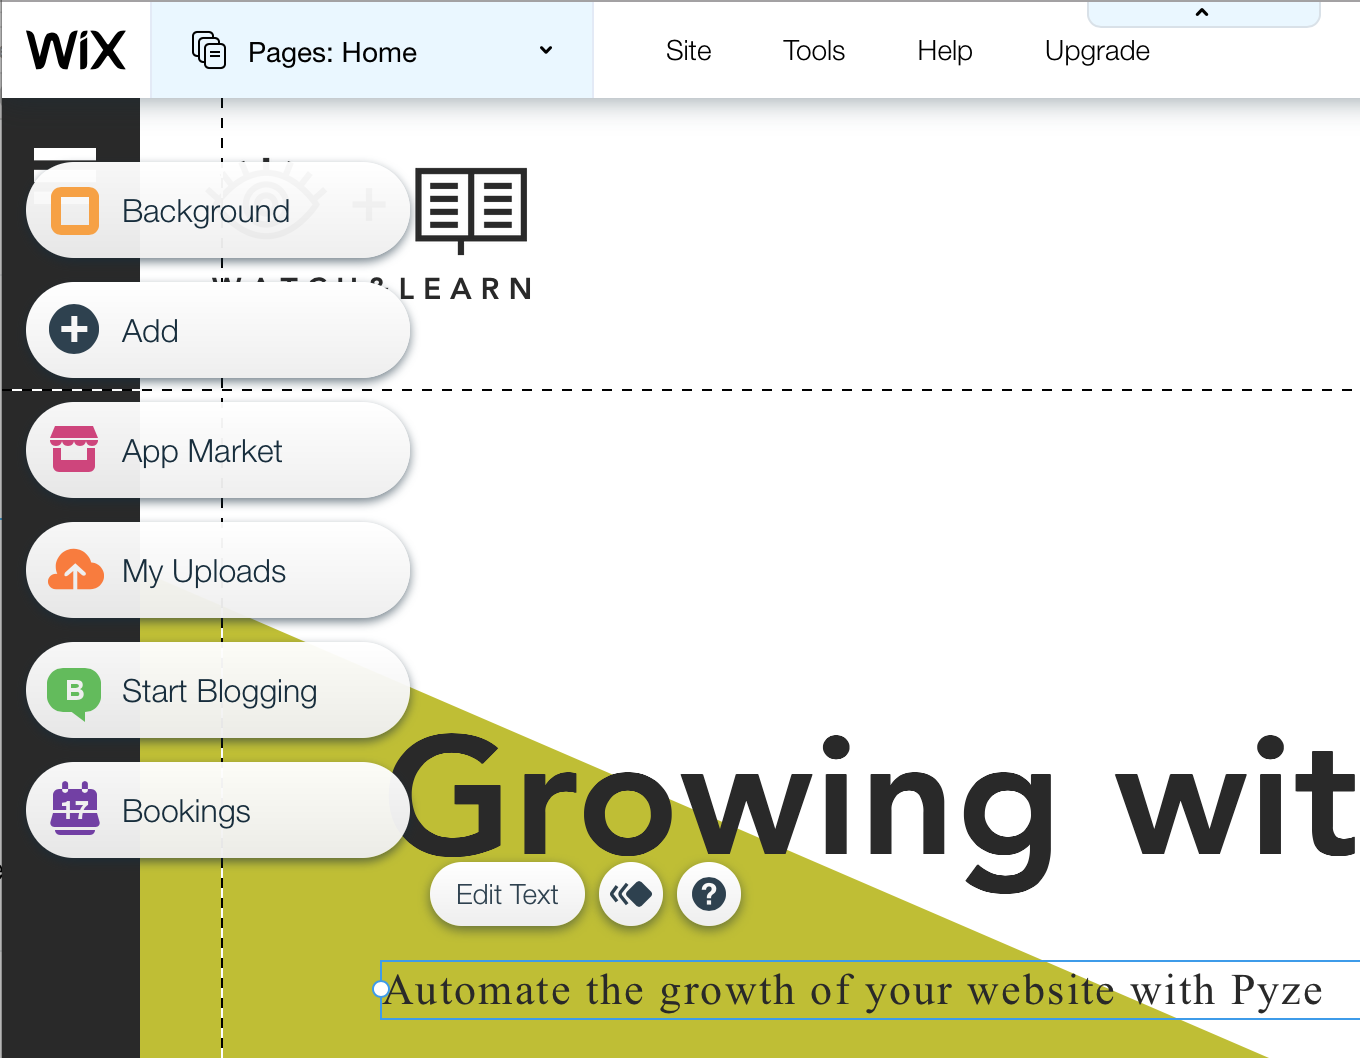
- more」の下にある「HTMLコード」を選択
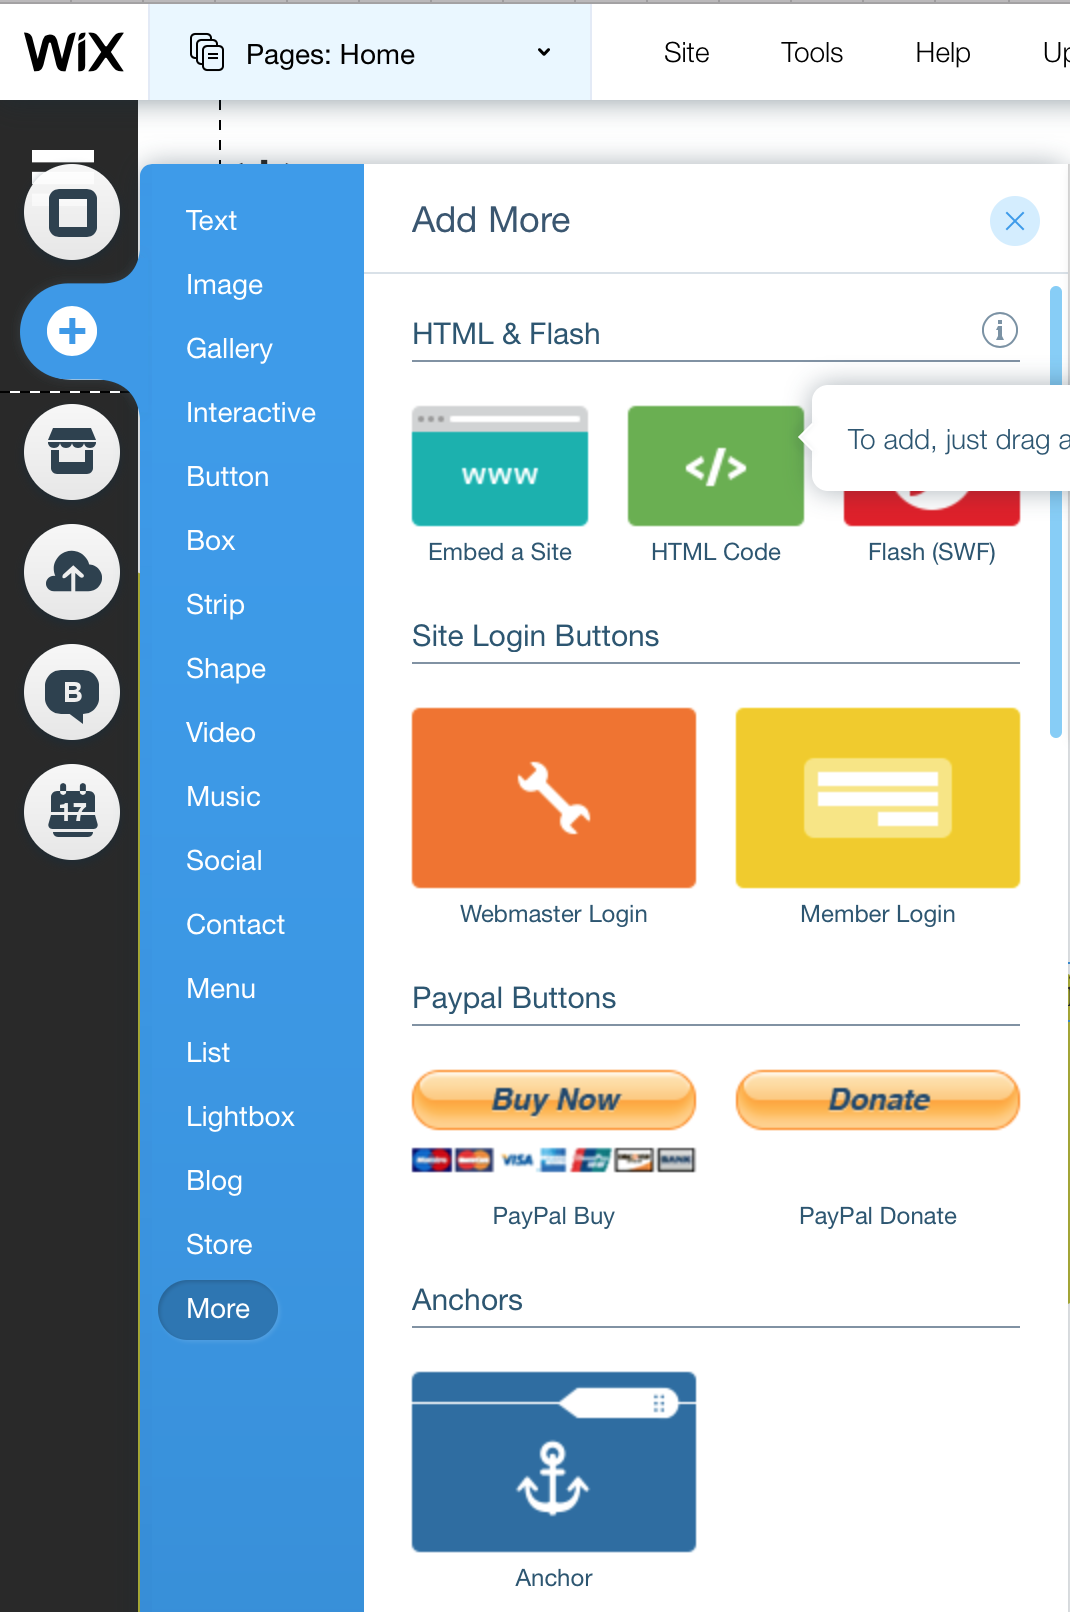
- Pyze App Keyを含むPyze Trackingのスニペットを貼り付けます。
// Start Pyze Script
<script type="text/javascript">
    var pyzeAppKey="YOUR_PYZE_APP_KEY";
    !function(e,t){var s=e.Pyze||{_q:[]},i=e.PyzeEvents||{_q:[]},n=e.PyzeCuratedEvents||{_q:[]},r=e.PyzeIdentity||{_q:[]};function p(t,e){function s(e){t[e]=function(){t._q.push([e].concat(Array.prototype.slice.call(arguments,0)))}}for(var i=0;i<e.length;i++)s(e[i])}p(s,["initialize","getTimerReference","getAppInstanceId","postWebAppVersion","postPageView","setUserOptOut","deleteUser"]),p(i,["postCustomEvent","startTimerForEvent","postCustomEventWithAttributes","postTimedEvent","postTimedEventWithAttributes","postExplicitActivation"]),p(n,["post"]),p(r,["setUserProfile","resetUserProfile","updateUserProfile"]);var o=t.createElement("script"),a=t.getElementsByTagName("script")[0];o.type="text/javascript",o.async=!0,o.src="https://cdn.pyze.com/pyze.js",a.parentNode.insertBefore(o,a),e.Pyze=s,e.PyzeEvents=i,e.PyzeCuratedEvents=n,e.PyzeIdentity=r}(window,document),Pyze.initialize(pyzeAppKey);
</script>
// End Pyze Script
警告
PYZE_APP_KEY を独自の appKey に置き換えたことを確認してください。
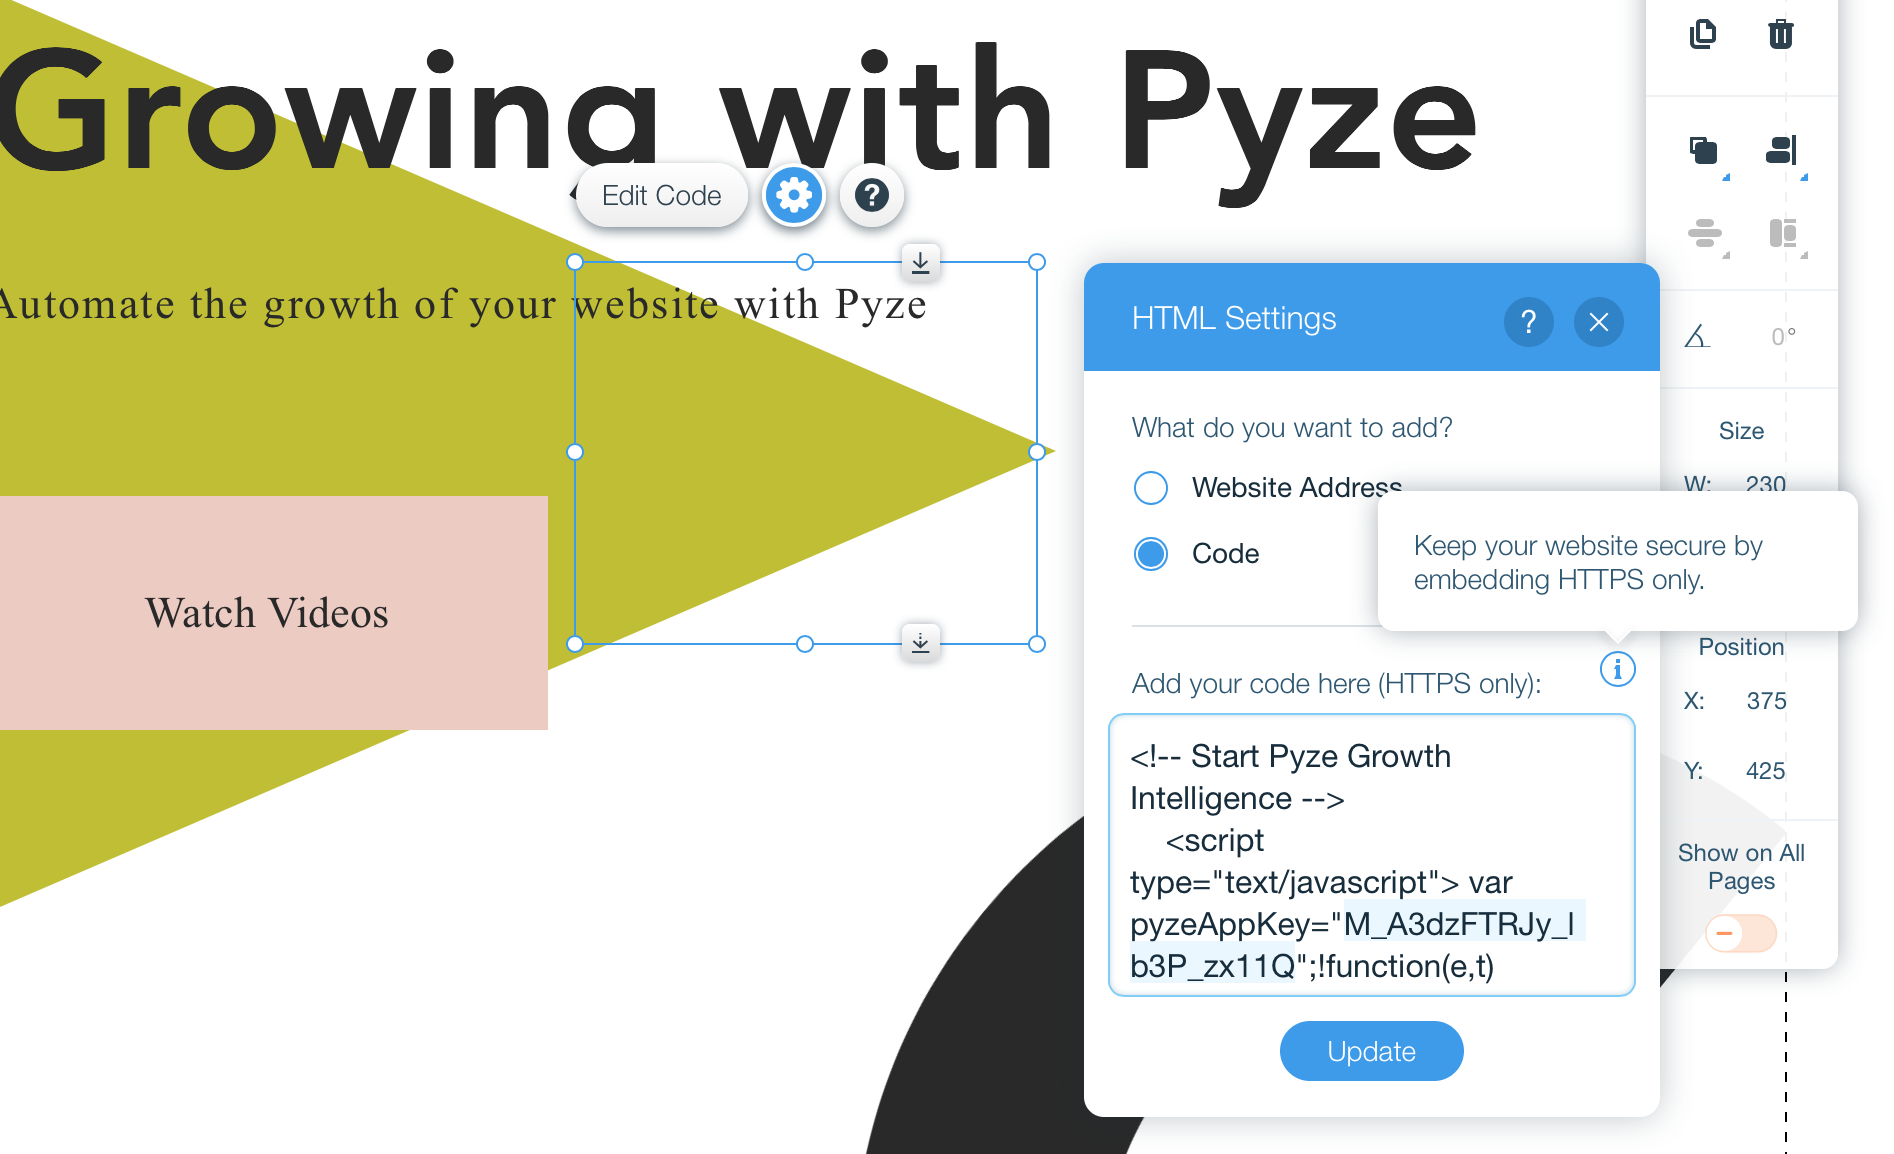
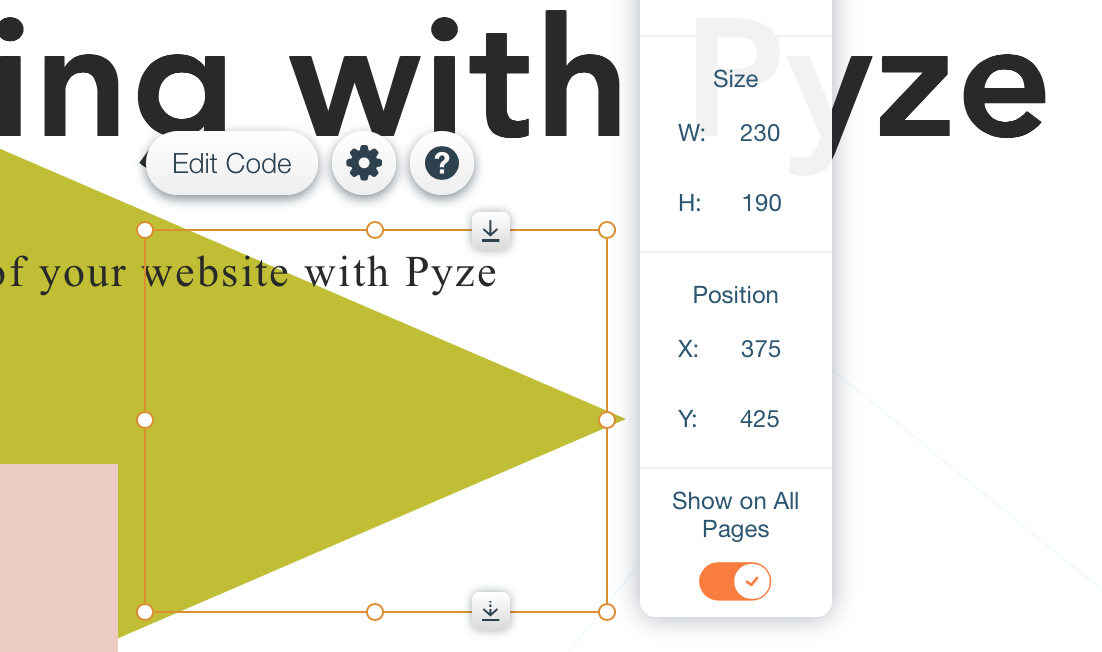
- すべてのページにHTMLスニペットを表示する “をオンにして、すべてのページにHTMLスニペットが表示されていることを確認してください。
- Wixウェブアプリの保存と公開
イベントとプロファイルについては、親ドキュメントを参照してください。
Wordpress
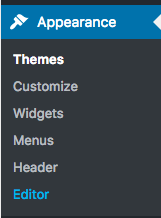
- セルフホスト型のWordPressサイトにログインし、ページの左ナビゲーションバーにある「外観」→「エディタ」をクリックします。
- header.phpファイルを見つけてクリックしてください。

- タグの前にPyze App Keyを含むPyze Trackingスニペットを貼り付けます。
// Start Pyze Script
<script type="text/javascript">
    var pyzeAppKey="YOUR_PYZE_APP_KEY";
    !function(e,t){var s=e.Pyze||{_q:[]},i=e.PyzeEvents||{_q:[]},n=e.PyzeCuratedEvents||{_q:[]},r=e.PyzeIdentity||{_q:[]};function p(t,e){function s(e){t[e]=function(){t._q.push([e].concat(Array.prototype.slice.call(arguments,0)))}}for(var i=0;i<e.length;i++)s(e[i])}p(s,["initialize","getTimerReference","getAppInstanceId","postWebAppVersion","postPageView","setUserOptOut","deleteUser"]),p(i,["postCustomEvent","startTimerForEvent","postCustomEventWithAttributes","postTimedEvent","postTimedEventWithAttributes","postExplicitActivation"]),p(n,["post"]),p(r,["setUserProfile","resetUserProfile","updateUserProfile"]);var o=t.createElement("script"),a=t.getElementsByTagName("script")[0];o.type="text/javascript",o.async=!0,o.src="https://cdn.pyze.com/pyze.js",a.parentNode.insertBefore(o,a),e.Pyze=s,e.PyzeEvents=i,e.PyzeCuratedEvents=n,e.PyzeIdentity=r}(window,document),Pyze.initialize(pyzeAppKey);
</script>
// End Pyze Script
警告
PYZE_APP_KEY を独自の appKey に置き換えたことを確認してください。
イベント情報
イベントをトラッキングするには、イベントハンドラを含むJavaScriptファイル(例: events.js)を作成し、その中でPyze Eventsを呼び出します。 イベントに関与する要素のidまたはclass属性を渡します。トラッキングのためにJavaScriptのCustomまたはCuratedイベント関数を呼び出します。以下はサンプルコードです。
jQuery( document ).ready( function( $ ) {
    $('#BlogPost_Read').click(function() {
        PyzeEvents.postCustomEventWithAttributes("Blog post read", {"Blog Title" : "Understanding web analytics"});
    });
    $('#BlogPost_Commented').hover(function() {
        PyzeEvents.postCustomEventWithAttributes("Blog post commented", {"Commented By" : "User Identifier"});
    });
    $('#BlogPost_Liked').click( function() {
        PyzeEvents.postCustomEvent("Blog post liked");
    });
});
JavaScriptファイルをWordPressサイトがホストされている場所に配置するか、テーマ内の「javascript」フォルダにアップロードします(https//testwpintegration.com/wp-content/themes/themeName/javascript/)
テーマのheader.phpファイルに、閉じているタグの前に適切なパスを追加して、ファイルをインクルードします。
<script type="text/javascript" src="/events.js"></script>
イベントとプロファイルについては、親ドキュメントを参照してください。